Woodworking

Framing it up

Front of the frame
Attaching the sides to the front. Note the MDF 'square'... I don't own a square yet.

For a while now, I've been interested in making a camper trailer. Something hard-sided for winter camping, but lots of ventilation for summer. It'd have to be light enough to tow - under 1000 pounds or so, and cheap enough to build without worrying about expenses.

Now that I have a job and a workshop, I can! It's kinda exciting.

Day 2: Planking

The completed box, in its pretty polyurethane polish.
Figure 1.

The creature is taking shape!The first day of construction left me with a set of planks. Two sides, a back, and a queer-looking front. The front has a few pivoting drawers: pressing on the bottom of the drawer will swing the top forward and out. Since the drawers push to open, no handles are needed, so the front can be perfectly flat. It looks slick (see illustration 1).

Drawer view, from what will be the inside of the boxWith the panels made up, I went back to gluing things together. The drawers were first. I cut sides for the drawers out of short lengths of scrap. I drilled holes near the bottom front of the sides to ensure that the drawer center of gravity would fall behind the holes (that way they close automatically). Then the bandsaw rounded over the top of the sides (they'll look really slick when they open and close). Then I glued the sides of the drawers onto the front faces and let it set. 

Day 1: Boards

Rough sketch of the organizer
A top view (top) 
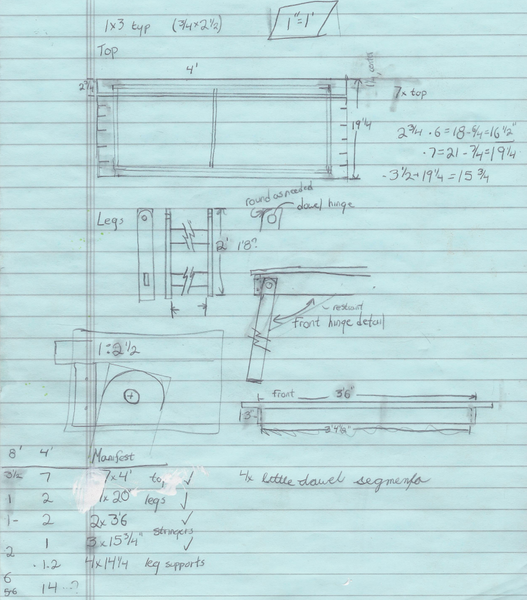
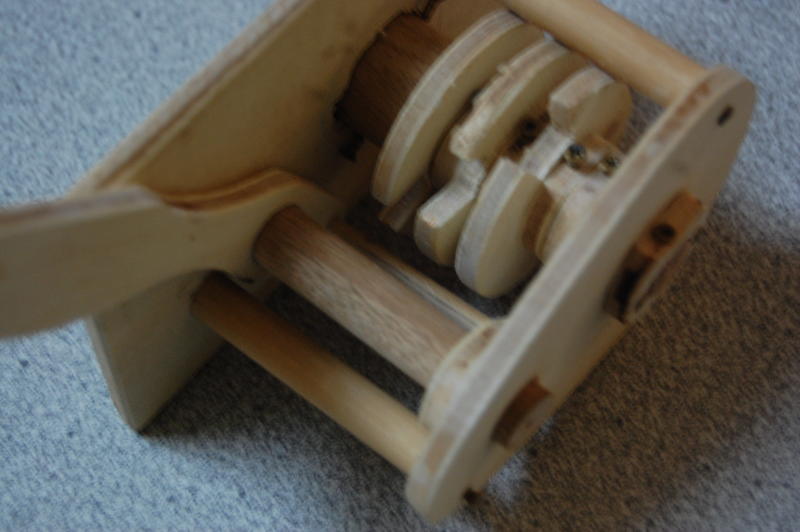
and a side view (bottom) of the organizer

I've been home from school for about three weeks now. The first few weeks were pretty active: there were plenty of things to go to, and most of my days were booked. The past few days, though, have been on the dull side and I was looking for something to do. When I asked, Helen said that her grandmother had been eyeing desktop organizers, and that perhaps one of those would be a satisfying project. After brainstorming for a while, she thought of a list of things that this organizer could ... organize ... for her grandmother: 

Coffee Table

I live in an off-campus house at college. It's a little thing: three beds, kitchen, dining room, living room. A sofa.

But no coffee table.

Not that anyone in my house drinks coffee, but we've wanted a knee-height table for the sofa for a while. Just to set drinks down on, or to use for homework. 

As long as I'm home, I decided to build one. As a design constraint, it's made entirely from 1x3 strapping. There is some reason for the choice. First, at $1.30 per 8' board, 1x3 is cheap. Second, the 1x3 theme matches a toolbox I built this summer. Third, it's cheap.

Woodworkish

For a few glorious hours, my dining room was transformed into a wood shop. 

Okay. "Glorious" is an exaggeration. So is "transformed" and "wood shop".

For the past month, I've been organizing an international food tasting entitled "Technology of Food". International students are presenting food from their homes, with a focus on how the resources and history of the nation shaped its cuisine. 

Cyclone

You know how sometimes, you have a big pile of sawdust to suck up, but you don't want to use a broom? How you'll pull out the shop vacuum? And how it'll breeze through the first bit of sawdust, then gradually choke and wheeze?

Even in normal use, a shop vac's filter gradually clogs with fine-grain sawdust. Eventually, the vacuum loses suction. The air filter isn't too hard to clean, but it'd be nice to keep it clean longer.

That's the idea behind dust separators: sawdust and air go into a cyclone. Sawdust is thrown to the outside edge and removed while the clean air exits to the vacuum in the middle.

Dust Sucker

Thien baffle - top view
Imagine air swirling around!

Why would anyone make a vacuum out of wood, you ask? I have no idea. But I'm doing it anyway.

Looking around the internet, I saw that Mattathias, of woodgears.ca, had built a dust collector out of wood. It used a Thien baffle for its filtration, and depended only slightly on filters.

Frustrated with the ever-clogging filters of shop vacs, I've wanted to make a cyclonic separator for a while. When I saw his unit - a quiet, standalone separator, I decided to build one.

Wooden Lock: Finishing

School starts, and I'm busy again. I have all sorts of cool things to write about, and not enough time to do so. But I'm on top of homework, so here's the conclusion to the combination lock saga!

I wish I could describe the measurements better, but that's a job for engineering drawings, not text. I'll see about making some proper drawings soon.

After deciding on about half the dimensions, we started cutting. The tumblers and washers were first, then I popped a few dowels onto the lathe to turn them down a bit. When I finished, the tumblers spun smoothly on the central shaft.

We assembled the core of the lock with brass screws. First, we slid a washer onto the central shaft, then a tumbler, another washer, and so on until it was built up. After a quick test to make sure everything interfaced well, we screwed the washers into the central dowel with brass screws, being careful to keep the tumblers under a bit of pressure (to prevent wobble and slippage).

Wooden Lock: Design

Last time, I described how a combination lock worked. This article describes how the concept is implemented in wood, and our early design process. We started our design by foraging for stuff surveying our assets. We based our design on the large sheet of ¼" plywood, and 3/16" and ½" diameter dowels we found. Foraging Looking for interesting tools netted us hole saws (ranging from ½" to 2" internal diameter).

Wooden Lock: Information

Recently, I made a combination lock out of wood. I'll be describing it in a series of articles because to save you, dear reader, from a numbing fifteen hundred word epic.

So, what in the world would posses me to make a combination lock out of wood? Well, some time ago, I saw a working model of a combination lock on woodgears.ca, looked it over, thought it was cool, and stashed the idea in the back of my mind with fulgurates and sous vide.

Months later, I was looking for winter break projects, and I thought of this lock. Helen & I decided to build a pair of them, scaled down from the version that Matthias built on woodgears. Why?

Pages